|
|
| |

|
|
|
The metalworking skill needed to construct the armor can be seen on this
page. These techniques were discovered by trial and error and through reading about
embossing.
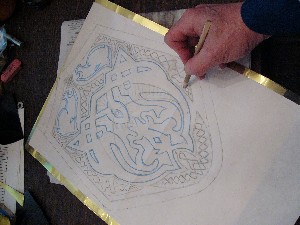
The first step was to make a full size drawing of each piece that needed embossing.
This is the pattern for Theoden's vambraces. The blue represents the leather trim and
the black is the embossing outline.
|
|
|
|
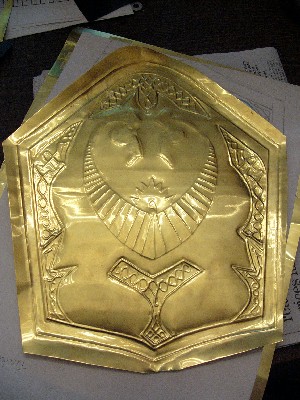
The vambrace embossing can be seen here. As I mentioned, it is important to
both EM-boss: make the original depression of the design in the metal from the back side,
and to DE-boss: go over the design from the front side to press the metal away from the
raised pattern and emphasize it. The embossing tool is a wooden stick. Use of metal
tools will scratch the metal, rather than embossing it. Use them only when absolutely
nothing else is working. You need to keep sharpening your wooden tool, as it will blunt
too much during usage. A pencil sharpener works well, but do not sharpen too much.
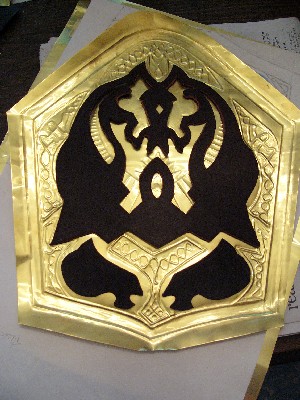
Here you can see the test to be sure that the leather trim blanks fit the embossed
metal base as planned, prior to embossing the designs on the leather. We advise this
step, since hand embossing is individual and there may be minor variations from piece
to piece which makes some final trimming of the leather necessary at times.
|
|
|
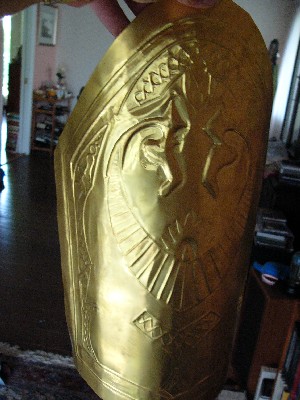
This is the bent metal. Lessons learned: don't try to bend these separately.
The problem is that it will deform since this metal is not very strong. The best way to
do it is to mark a really accurate center line down both the front of the plastic and
back of the metal, spread the glue on each piece and wait for it to become very tacky.
Place the metal face down on a firm padded surface. Then attach the pieces together
along that center line and roll the pre-curved plastic first one way and then the other to
attach the metal to it. If the edges are not sticking well you have the option of pressing
it by hand, or placing small clamps. We pressed by hand since we did not want any marks
on the metal edges.
|
|
|
|
It has been suggested by a jeweler who has seen the finished armor, that
it would not be a bad idea to fill all the embossed brass with Flexall to insure that
the embossing stands up well to any accidental crushing during transporting, storage or
wear.
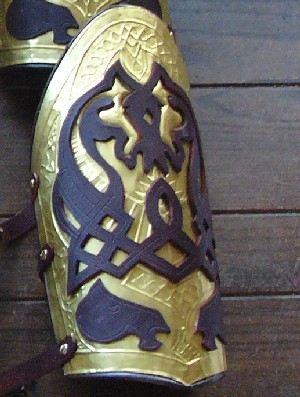
Here you see the completed piece, with embossed leather trim,vinyl piping and
riveted embossed straps. The rivets also have a sunstar of Rohan design. They are a
discontinued pattern from Tandy leather.
|
|
|
|


|
|